

When it comes to keeping your home or office comfortable, a split system air conditioner is an efficient, reliable, and cost-effective choice. Whether you’re installing a new system or replacing an outdated unit, understanding the installation process and why it’s important can help ensure optimal performance and energy efficiency.
In this guide, we’ll walk you through everything you need to know about installing a split system air conditioner and replacing your old unit, covering all essential details to make the process as smooth as possible.
What is a Split System Air Conditioner?
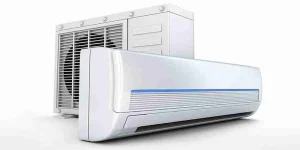
A split system air conditioner consists of two main components: an indoor unit (which blows cool air into the room) and an outdoor unit (which expels the heat). These units are connected by refrigerant pipes and electrical wiring, providing an efficient solution for cooling single rooms or open-plan spaces.
Why Choose a Split System?
- Energy Efficiency: Split systems are more energy-efficient than older cooling methods, as they target specific areas without wasting energy.
- Quiet Operation: The outdoor unit houses the compressor, keeping the indoor environment quieter.
- Space-Saving: They don’t require large ducts, making them ideal for apartments or homes where space is limited.
- Affordable: When compared to central air conditioning systems, split systems are generally more affordable to purchase and install.
Replacing Your Old Unit with a Split System
If you currently have an old air conditioning unit, it may be time to replace it with a more efficient split system. Here’s a breakdown of the process:
1. Choose the Right Split System for Your Space
- Room Size: Ensure that the system is appropriately sized for the room or area you wish to cool. An undersized unit will struggle to cool the space, while an oversized unit will cycle on and off too often, wasting energy.
- Energy Rating: Look for energy-efficient models with a high star rating. A more efficient unit will save you money in the long run.
- Additional Features: Modern units come with features like Wi-Fi control, air purifiers, and reverse-cycle functionality for heating, which may be worth considering.
2. Prepare for Installation
Before you start the installation process, here are some things you’ll need to do:
- Clear the Area: Ensure there is adequate space around both the indoor and outdoor units for easy installation and maintenance.
- Electrical Requirements: A qualified electrician will need to ensure that your electrical system can handle the air conditioner’s power requirements.
- Drainage: The indoor unit will need to be connected to a drainage system to handle the condensation that is produced during operation.
3. Remove the Old Unit (if replacing)
If you’re replacing an old system, the first step is to safely remove the old unit. This involves:
- Disconnecting power and refrigerant lines.
- Carefully uninstall the indoor and outdoor units.
- Clearing any debris or damage that could affect the new installation.
4. Installing the New Split System
Installing a new split system is a detailed process and should ideally be carried out by professionals. Here’s a simplified version of the steps:
- Indoor Unit Installation: The indoor unit is typically mounted on an interior wall, ensuring it’s high enough to circulate air effectively but not too high to cause discomfort. It needs to be level and securely mounted.
- Outdoor Unit Placement: The outdoor unit should be placed on a flat surface, away from obstructions. It needs to be installed where it can efficiently expel heat and remain in a well-ventilated area.
- Connecting Refrigerant Lines: The refrigerant lines are connected between the indoor and outdoor units. Proper insulation is essential to prevent any energy loss.
- Electrical Connections: The unit will be connected to the electrical system, ensuring that the unit has a dedicated power supply for safety and efficiency.
- Testing: Once everything is connected, the system will undergo a thorough test to ensure proper operation and cooling performance.
5. Post-Installation Maintenance Tips
To ensure your new split system runs smoothly, follow these maintenance tips:
- Clean the Filters: Regularly clean or replace the filters in your indoor unit to prevent dust and dirt buildup, ensuring better air quality and efficient performance.
- Check the Drainage: Ensure the drainage system is functioning correctly to avoid water leakage.
- Professional Servicing: Have the system serviced by a professional at least once a year to ensure it’s running efficiently and to prevent costly repairs down the line.
Why You Should Hire Professionals for Installation
While some homeowners might be tempted to install the system themselves, it’s always best to hire a professional HVAC technician. Proper installation ensures:
- Safety: Incorrect installations can lead to electrical or refrigerant leaks, posing safety risks.
- Efficiency: A professional ensures that the system operates at its highest efficiency, saving you money on your energy bills.
- Warranty: Many manufacturers require professional installation to honour warranties, so it’s crucial to ensure the job is done right.
Installing or replacing a split system air conditioner can significantly improve your home’s comfort, energy efficiency, and air quality. By choosing the right system, preparing properly for installation, and ensuring the job is handled by professionals, you’ll be able to enjoy reliable and effective cooling for years to come.
Contact Air Max
At Air Max, we specialise in the installation and replacement of split system air conditioners. Our team of experts is ready to help you find the perfect solution for your cooling needs. Contact us today to schedule an installation or consultation!
